
What is JUnit?
This is the testing framework used for the unit testing for java programs. This is an open-source testing framework, we can create the test cases for our program using JUnit. This can help us to know if the program logic is working as expected.
We have 2 types of unit testing
- Manual
- When we perform the test cases manually without using any support tool, it is called manual testing.
- The drawback of manual testing is that it is time-consuming and users can make mistakes while testing.
- Automated
- In automated testing, we use a support tool to test the program. Since it is automated, it’s faster than manual testing and has fewer mistakes.
Here we will see how we can write the unit test cases for our java program logic.
Before proceeding further we will download the jar for JUnit from : Download JUnit
Once the above jar is downloaded we will add this jar to our eclipse configuration.
Open eclipse and Go to Window → Preferences as shown in the below image.

Then go to Java → Build path → classpath variables → New as shown in the below image

Give the name(Any name can be given) and select the path for the jar as shown below. Click OK once you are done selecting.

We will able to see that jar is added in the classpath variables. Then click on Apply and Close.

Example:
Once Jar is configured in the eclipse we will see the simple example to test.
Go to File → New → Java project to create a new project in eclipse as shown below. Give the Project Name and then click on Finish.


We will able to see the project structure is created as below.

Create a new package and java class for testing as shown below.
We will create 2 classes Add and TestClass.
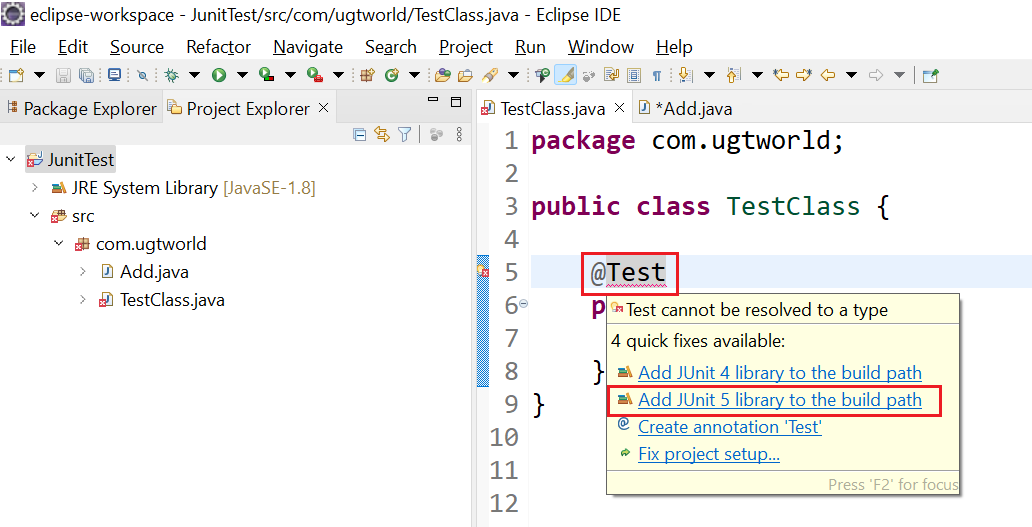
In the TestClass if we add the @Test annotation we will get the error once we hover over that we will get the suggestion to add the JUnit library, we will add Junit 5 as shown below.
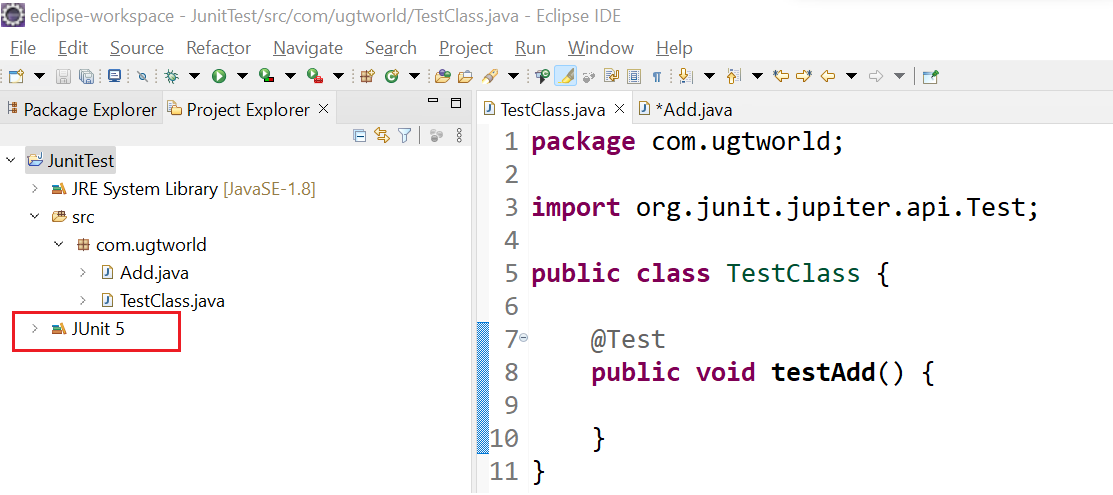
Once added, JUnit5 will be added to the project package as shown in the image below.
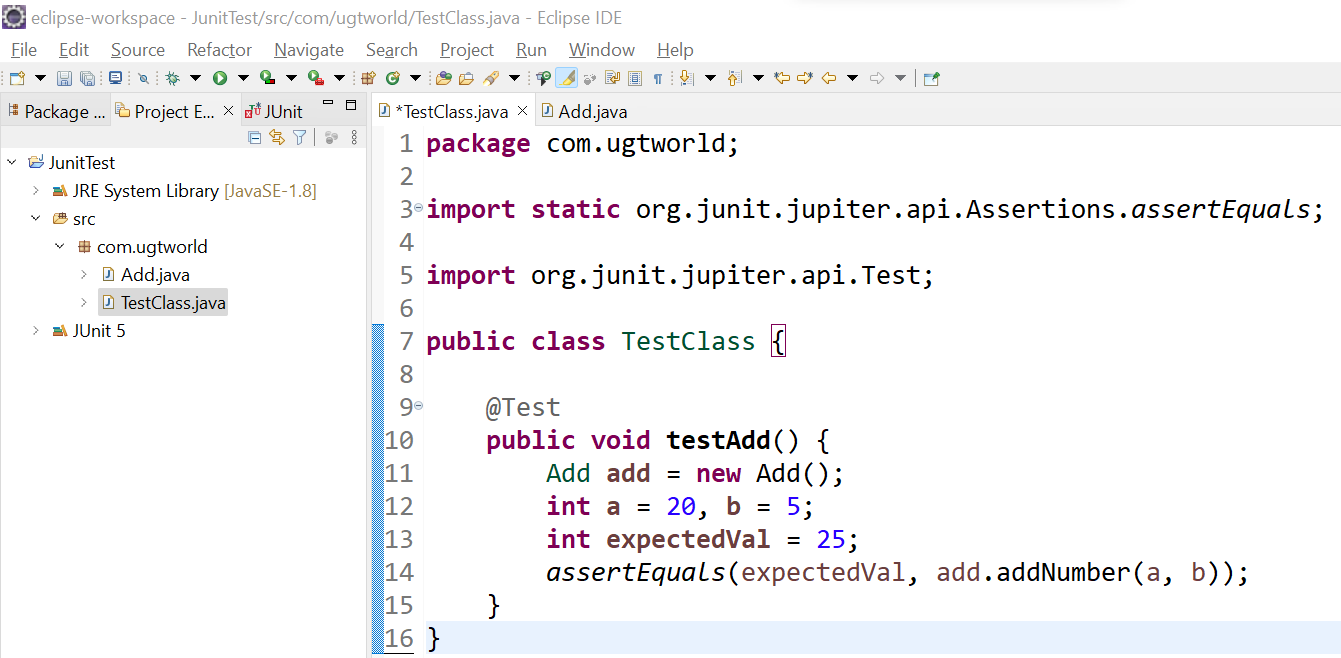
Now we will create the method to test the addNumber method from Add class as shown below.
To run the test, right-click on TestClass.java then select Run As → JUnit Test as shown in the below image.

When the Test is successful we will get the ‘Success’ result as shown in the below image. Since whatever expected value is matching with the value returned by the addNumber method of Add class.

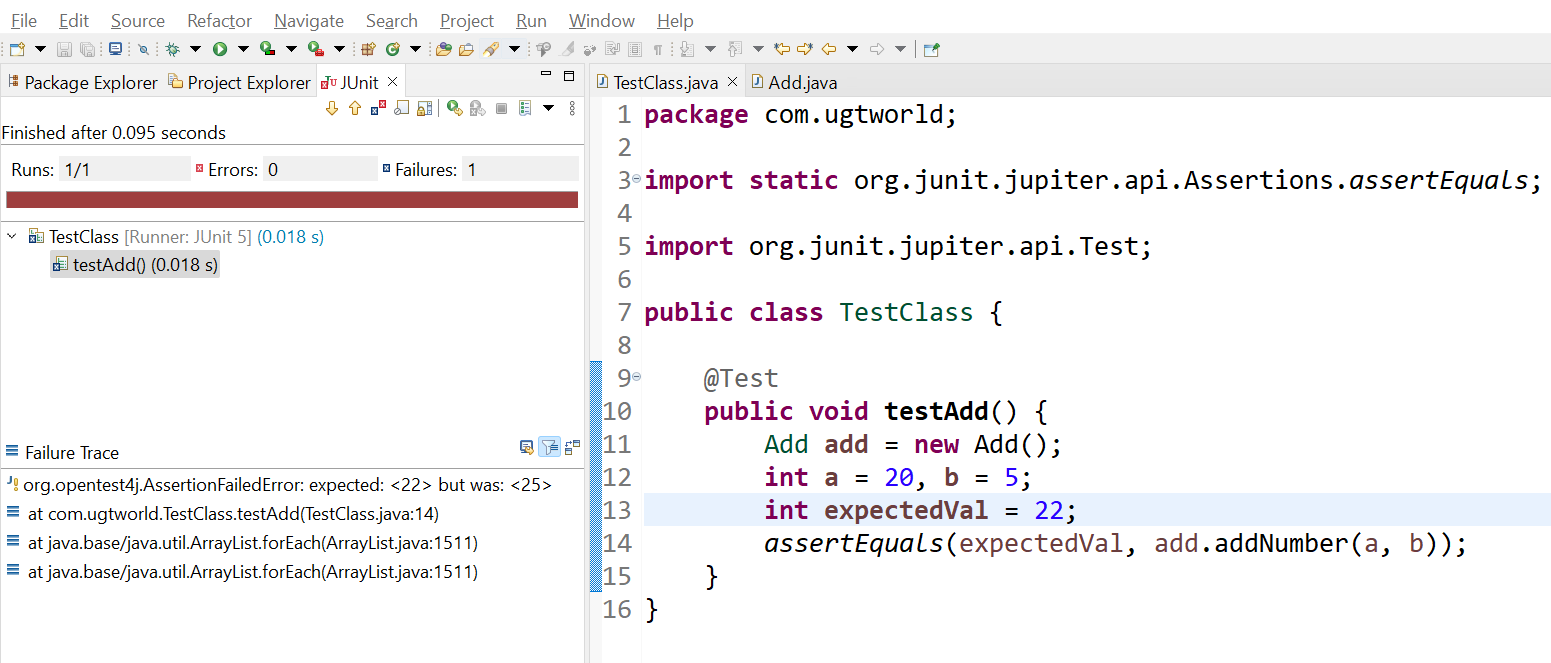
If we change the expected value to another except 25 then we should get the failure result as follows.
Like this, we can check for multiple methods and the expected result is matching with the value returned by that method.
Add.java
public class Add {
public int addNumber(int a, int b) {
return a + b;
}
}
TestClass.java
import static org.junit.jupiter.api.Assertions.assertEquals;
import org.junit.jupiter.api.Test;
public class TestClass {
@Test
public void testAdd() {
Add add = new Add();
int a = 20, b = 5;
int expectedVal = 25;
assertEquals(expectedVal, add.addNumber(a, b));
}
}

