What is MySQL toolkit?
We have seen what MySQL is and how to install the same. in this blog, we will see what is MySQL toolkit and how we can use the same.
We have seen that we can use MySQL workbench to run the commands or to connect to the database. Same we can use via the command line without installing the workbench.
Following is the command(for windows) to check if MySQL is running on the system or not.
mysqladmin -u root -p ping
Enter password:
mysqld is alive- Once you enter the ‘mysqladmin -u root -p ping’ command then it will ask for the password, usually, since we installed MySQL via chocolaty it will create a default root user with an empty password.
- In the above command -u means the user which will ping the server, in our case user is ‘root’.
- -p means password for that user.
To check the version of MySQL following command is used.
mysqladmin -u root -p versionWe will get the details as shown in the following image.

Enter the following command for connecting to the MySQL tool.
mysql -u root -pOnce we are connected we will see the message as shown in the below image.

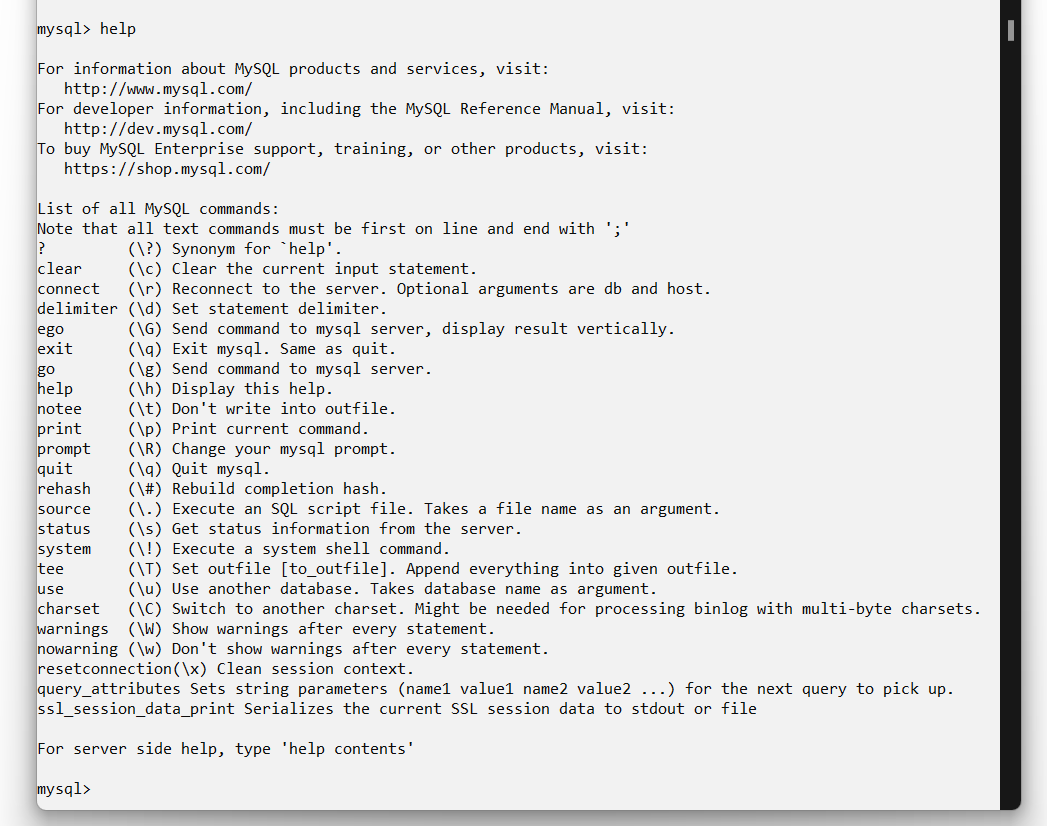
Enter help after the mysql tool is connected, we will get some helpful commands which will help us while we are using the toolkit as shown in the below image.
We can enter the following command to show the databases in our current root user we will get the output as shown in the below image.
show databases;
The same command we can use in our MySQL workbench and we should get the same output as shown in the following image.

From the toolkit, we can also get the system using the same command we used previously as shown in the below image.

If we want to use or work on one particular database we can use the following command.
use sys;In the above ‘sys’ is the database name we want to use. For example, if our database is ‘testdatabase’ then we can enter the command as
use testdatabase;Once we are changed to the database given we can see or create tables in that database. Creating tables and user-defined databases we will see later. For now, we will see the existing tables by using the following command. All the tables present in the database will be listed.
show tables;
Same above tables we can see from MySQL workbench as shown in the below image. Note that Schema means database. Go to the schemas tab as shown in the following image and expand the schema(database) you want to check.

We can select from the table by using the following command.
SELECT * FROM sys_config;
Since in this blog we know how to check and connect to the database schema, in the next blog we will see how to create users with different permissions.