
What is Spring Boot?
We have seen what spring is and why it is used. Now we will focus on the Spring Boot. Spring Boot is a project that is built on top of the Spring Framework. It provides an easier and faster way to set up, configure, and run simple and web-based applications.
The Spring module provides the RAD (Rapid Application Development) feature to the Spring Framework. It is used to create a stand-alone Spring-based application that you can just run because it needs minimal Spring configuration. SpringBoot makes it easy to create stand-alone, production-grade Spring based Applications that you can “just run”.
Features of Spring Boot:
- We can create stand-alone spring applications
- Springboot has embedded Tomcat, Jetty, or Undertow so no need to deploy war files.
- It has started dependencies to simplify our build configurations.
- It automatically configures spring and 3rd party libraries.
- It Provides production-ready features such as metrics, health checks, and externalized configuration
- It requires no code generation and no requirement for XML configuration since Springboot automatically configures applications based on the dependencies added to the project by using @EnableAutoConfiguration annotation.
- Springboot automatically scans all the components included in the project by using @ComponentScan annotation.
How to create a Springboot project?
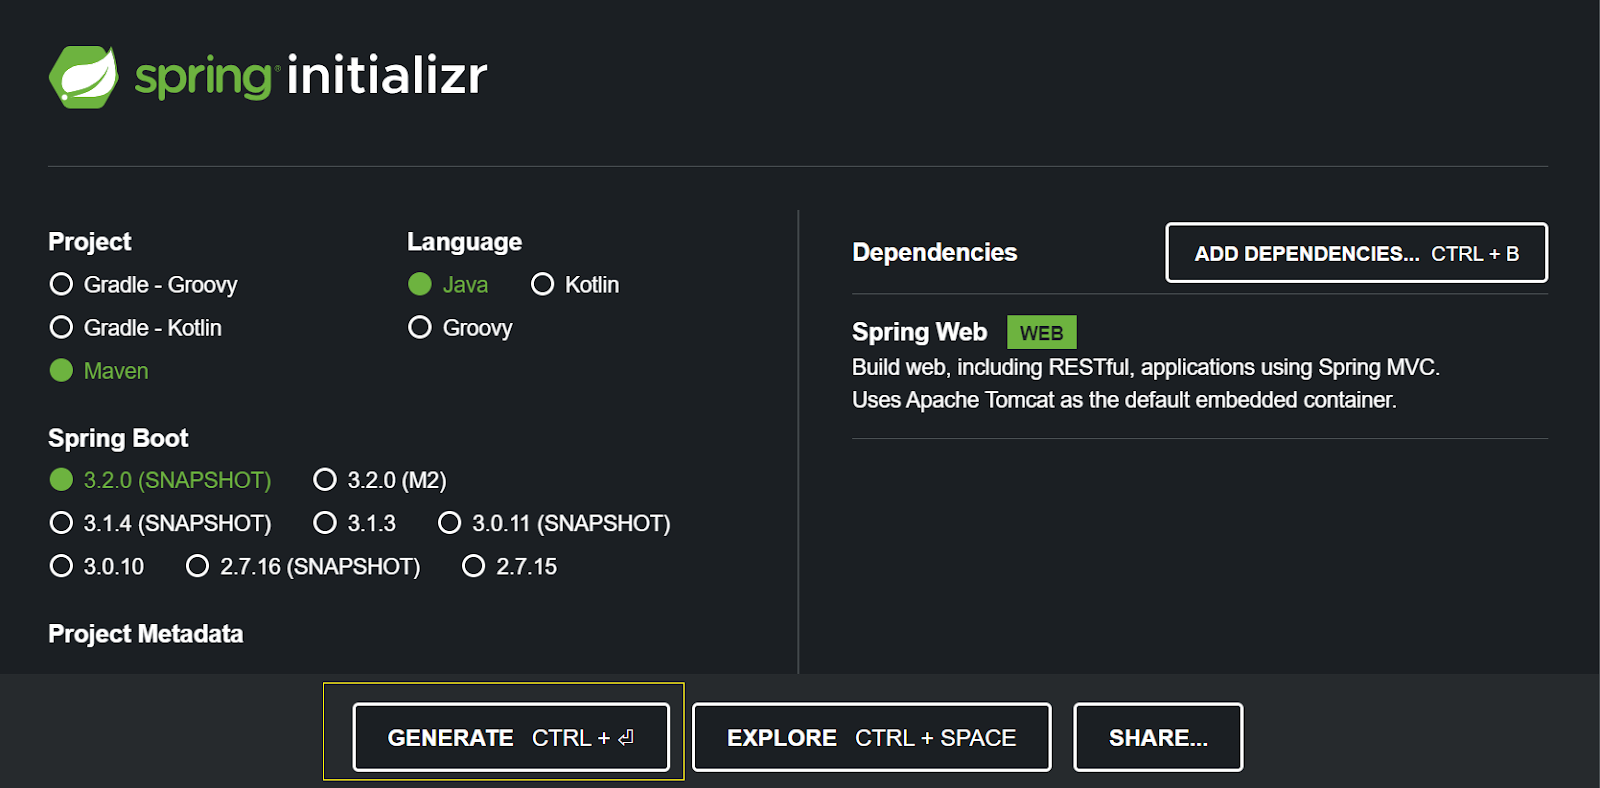
We can create our own Springboot project by using https://start.spring.io/ Following are the steps to create a Springboot web application.
Step 1:
To create a “web” project go to spring.io and select project, language, and Springboot version as per the project’s requirement.

Step 2:
Add project metadata details accordingly.

Step 3:
In the “Dependencies” dialog search for and add the “web” dependency as shown in the screenshot.

Step 4:
Once required dependencies are added hit the “Generate” button, download the zip, and unpack it into a folder on the computer.
Step 5:
Once jip is extracted, we can add the project in the eclipse by importing the maven project as shown below.

After successful import, we can see our project added in the package explorer as shown in below image.

We can see that our main class is also created for Springboot application like below with annotation @SpringBootApplication.

Step 6:
We can run our application by running the above main class as a Java application as shown in the below image

Our SprinBoot application will start with the below message printed in the console.

As we can see from the pom.xml we can see the dependencies added to our project by selecting the pom.xml tab.

We can also select the Effective POM tab as shown above to see all internal dependencies added.